Monday, 29 November 2010

Chrismas holidays in Italy and festive road trip planning! Can't wait!


I just wanted to share my feeling about how thrilled I am about going to Italy over the Christmas holidays in less than a month time now!
We booked the flight from Leeds and will be visiting relatives and friends from north to south and then back north again: we will land in Bergamo, spend a day in Cremona at my sister's, where we'll rest for one day or two. Cremona is the place where I studied and spent most of my life and where my recent memories belong to so I really look forward to get there.


,
This is Cremona famous for the traditional nougat made here, the mostarda and the 'Torrazzo' tower. It's a record high bell tower that makes the city famous as the city of the 3 T's "turun, tettas, turas" ( literally nougat, big tits, and torrazzo :))
Then we  travel by car to Napoli to get to my grandma Lucia by Christmas eve.

She's 86 years old and still she spends her days cooking...and planning what to cook for the day after hehe. I love her so much! We'll stay in a nice hotel near her flat in the centre of Naples, Vomero area,  as we are a troup of nieces and with our partners and won't fit all in the house to stay overnight, but for sure I ll take many pictures about all the typical Italian Christmas food.
There will be a seafood based home made pasta, for sure. Ah and struffoli as dessert, it's a typical sweet cake made up by many fried balls of dough then covered with honey melted with water. Needs to be tasted to be described :) I tried just once to make them, over my first Christmas here in UK as I felt really homesick (it's always difficult to spend the festive time away from the family I guess) ... well the result wasn't perfect but it made me feel better! This is how Neapolitan struffoli  look like, but I prefer without the candies, like this version taken by my very talented cousin Fabio:


check out his amazing work on flickr.com  on this link (his nickname is bluedeepblue) http://www.flickr.com/photos/bluedeepblue/


This one is more 'colourful' version of the same dessert:


Now, I cannot think of another Neapolitan dessert more Christmassy than this one.
Struffoli does remind me of those traditional medieval banquet dishes: full of colors and of...everything! Dont't you think?

I love my hometown, but I particularly love it over Christmas time: I adore taking long walks in the crowded narrow streets in the historical centre of Naples, visiting the area of San Gregorio Armeno is a must do: talented artisans sells hand crafted nativity scenes (famous 'Presepe Napoletano' is a tradion for centuries), and you can smell any sort of delicious food from every corner.


There's not a 'typical Italian Christmas menu' as every region, every town has its own tradition. So the one I am used to is the one from Napoli as this is where I spent my childhood.

The tradition is generally a big dinner at Christmas eve, lasting HOURS. I don't feel like I could be able to cope with such a huge amount of food anymore, but I still love the idea of a moment when the whole family manage to gather together on one happy occasion, and of course good food makes everything easier.

A typical -basic- Neapolitan Christmas menu could be:
Seafood tagliatelle (usually with fresh clams)
Baccala' neapolitan way (cod preserved in salt and then fried,  sorry the description doesn't make justice)
other sea food such as shrimps, or fish such as Spigola (sea bass).
Insalata di rinforzo (salad made with anchovies, green olives and red peppers)
Struffoli (see above)
Roccoco' (another typical chocolate sweet)
and much more...I will be able to show you my picture when we come back, can't wait!


After Napoli we will travel back to Cremona, have a dinner party with all our best friends that live in nothern Italy and the day after travel even further north to Trieste to see my mum's sister family and spend the new year's eve with her family. After this crazy travelling time we'll fly back to Leeds from Treviso airport (it's not too far from Venice/Mestre) and I am sure I ll have PLENTY of picture to share here on the blog...so please stay tuned!

  
                  Here's a nice view of Trieste Piazza d'Italia, the main square of the city,  over the Christmas time.
                                  They' say it's the biggest square in Europe as it faces directly on the bay.
                                                                Quite poetic, don't you think? :)


I am looking into presents to bring over, probably some traditional English festive food like Christmas pudding or ...hemm please help me hehe I lack of ideas!

And here is a picture that makes me smile so much: it's from one of our childhood Cristmas spent in Naples,I was probably 6 here, with my sister Margherita (the one with a beige dress) and my  two cousins Fabio and Claudia. We tired to take this same picture in the same location a couple of years ago as grown up...but I am not brave enough to post it here hehehe.
 In case you wonder, I am the one with the evil face and the red dress hehe. Happy times! Please feel free to comment below and let me know about your plans for the holidays, and if you like also your Christmas menu and home made or original gift ideas!

Monday, 8 November 2010

Genovese style homemade focaccia bread (focaccia genovese versione casalinga)


This was my first attempt in making a focaccia bread, the only other time I made one was a different type of bread that included potatoes in the dough. I firstly need to say this experiment was quite successfull for a first try and I will surely repeat it as soon as I have some friends over for dinner as I think it's a very appetizing starter to share with some Italian typical cheeses and hams and a nice glass of red wine. You can rest assured no one will complain or refuse a second slice of focaccia :)


This particular kind or bread is typical of the Liguria region in Italy, in particular the city of Genoa. Some even have it for breakfast with their morning cappuccino! (and this is definitely not a sweet bread...)
The origins of this recipe date back to centuries ago, and it's part of the popular tradition of the Italian food.

I made three different styles of focaccia: plain with rosemary only, with onions (my favourite one) and with a little bit of tomato paste and feta cheese.

I also need to say that to make this focaccia bread you will need to be quite patient: as the secret of a good focaccia is a well raised dough...so if you're in a hurry better plan to prepare this the day before or...change recipe  :)

Here's what I did.

For the dough:
350 grams of strong bread flour
200 ml water (lukewarm)
20 ml oil
7 gr salt
1 tbsp honey (or even better of malt)
7 grams dry yeast

For the condiment:
This is up to your taste/fantasy but for sure you will need:
50 ml of a very good extra virgin olive oil
50 ml water (I use some salt in the water too)
and if you like:
1 onion or
green olives or
rosmary

I used my precious bread machine as I am too lazy to prepare the dough. I simply poured the dough ingredients in (all but the yeast first, this will be added a little bit later so that it doesn't get in touch with the salt)


and patiently waited for the dough to double its size, it will take approximately 1 hour. If you don't have a bread machine you can leave the bread in the oven (turned off) with just the lights on as it keep the air off and allows the dough to raise at a constant temperature (the one from the oven lights).


Once the dough has doubled its size, set it on a floured surface and fold it once or twice: this will allow the dough to get 'stronger' and easier to work. Let rest for 30 minutes.


In the meanwhile you can prepare your oven tray by using some oil or some baking foil ...I used both :) 
I prepared 3 different trays, as I made 3 different kinds of focaccia. 


Divide the main dough into 3 separate balls and spread each one onto each tray: while doing this make sure you don't 'pull' the dough with you hands but just 'push' it down to spread evenly on the tray surface.
Leave to rest for another 30 minutes. 


And now the focaccia is ready for your fingerprints :) with your fingers create the typical dots texture in the dough. This will not only give the typical focaccia look, but will also allow the oil , the water and he condiments to fills these smalls holes keeping it moist and tasty. Add the olive oil and also some water in the centre of the focaccia, and keep on doing the small dots.

Sprinkle some salt on the surface (better if coarse salt) and add your condiments. If you're using onions I would reccomend slicing them finely and let them in the microwave oven for a couple of minutes first, so they go in the oven softly and won't be raw when the focaccia is ready as it takes only about 15/20 minutes to cook at a 200 degrees temperature.

This is my onions focaccia before baking

Fresh rosemary is totally different, but unfortunately I didn't have it ...

and here's the result!

let cool down for 20 minutes....ok 10 minutes ;)

Time to share with friends and family...buon appettito and I hope you enjoy!

Sunday, 31 October 2010

Gnocchi with pumpkin and pork mince ragu'

WARNING: SCARY CONTENT! ;)
Happy halloween! Yes I know, this is not the best picture I could have choosen to show my face for the first time, but don't worry this is not my everyday look heeheh.You can also see pictured  the main ingredient of today's recipe: my 50 pence pumpkin from Tesco! We decided to celebrate halloween watching  some japanese horror movies with a nice bottle of red chianti and a very filling main course: gnocchi with pumpkin and pork ragu'. Here's the final dish:


you will need:

500 gr of gnocchi (I used ready made ones, but ideally home made gnocchi are perfect for this dish)
300 gr pumpkin (in this case I used what I scooped from the one we carved in the picture above)
350 gr pork mince
1 glass red wine
1 medium onion
1 small red chili
olive oil
pepper, salt to tase

First prepare the pumpkin in a bowl and finely chop the onion and carrot to prepare the base for the ragu.
Start by fring the onion and the carrot in a bit of olive oil in a pan, when golden add the mince meat and keep stirring. After some minutes, add the glass of red wine:


Now you can add the pumpkin:


keep stirring and add a cup of water to allow the pumpkin to cook properly, add pepper and salt. I also added some of my fresh chilies ( no seeds!)


In the meanwhile prepare the gnocchi by boiling them in a separate pan:  add some water in a pan, salt and when boiling add the gnocchi. Once they start raising to the surface it means they're ready and you can drain them:

ready! Drain the gnocchi, mix them with the ragu and add some grated cheese. Serve hot


Enjoy your halloween!  - Above: meet Cheeky, my british shorthair kitty quite curious about the pumpkin

Friday, 29 October 2010

courgettes and chees croquettes

I have been away for a while, so firstly I apologize for the lack of recipes over the last few weeks. Things should get better now and I will be back on the blog with more constance...I promise!
Today I have tried a dead easy (and cheap!) recipe inspired by an Italian friend that suggested the same one with feta. I don't have any feta cheese so I had to go with cheddar for this one, though I think parmesan would be an even better choice. Anyway...it took me about 15 minutes in total to prepare and cook these tasty croquettes so anyone should be able to do it (I guess! :))
Ingredients you will need for about 12 croquettes:

- 2 courgettes
- 2 eggs
- 1 medium onion
- 100 cheese (feta, parmesan, or cheddar - the one I used for my attempt)
- 1 cup of bread crumbs
- chopped parsley
- 50 gr all purpose flour
- salt and pepper to taste
- seeds oil for frying

Using a regular grater, grate the 2 courgettes, the cheese and the onion in a bowl. Add the 2 eggs, the parsley, the bread crumbs and mix well.


Form some small balls ( I try  to give them a flat shape, not too spherical so they cook better) and dust them with some all purpose flour. In the meantime, warm up the oil in a frying pan


 fry them for about 10/12 minutes turning them until crispy and golden on the outside:


yum! This smells so nice! 


If you are using feta cheese, I would suggest not to add any salt as this kind of cheese is already very salty.

Once these are ready, leave them on some kitchen paper for 5 minutes so that the extra oil is absorbed and serve hot with some dipping sauces, some garlic ciabatta and fresh green salad.

Buon appetito!

Tuesday, 21 September 2010

Gratin di patate filanti - grated potatoes cake with ham and mozzarella

This is a very easy 'experiment' I did the other day as I ran out of ingredients for my dinner, but I can guarantee the result was appreciated by Matt as all he could say while eating was: '..hmmm...delicious!' and that kept me smiling as I totally improvised this out of desperation caused by a lack of food in the fridge.
I took some inspiration to it  from the neapolitan gatto' (gateau, one of the many french influences in our neapolitan dialect), though very different as in gatto' the potatoes shoud be mashed and there's also eggs and other ingretients in it... so I named this one ' Gratin di patate filanti'. Here's what I did:

Ingredients for 2/3 persons:
4-5 medium potatoes
100 gr ham (cured)
50 gr parmesan cheese grated
bread crumbs
half glass of milk
120 gr mozzarella cheese sliced 
butter 
pepper 
salt 


I boiled and peeled 5 potatoes
sliced them and placed them in a pre-greased oven tray (I used a pyrex one), and made different layers with
potatoes
ham
mozzarella slices
sprinkled parmesan
and so on until the ingredients are all in the tray

In order to make the outside of the bake crispy and nice I covered it with some bread crumbs and butter flakes  and just a little bit of milk all over the top ...bake in the oven for 30 minutes ...

and this is the result (courtesy of Matt's plate above...) you can also serve it as a side dish for some oven roasted chicken I think, but it's filling enough to be served as a main course! Buon appetito!

Thursday, 16 September 2010

Risotto ai funghi con porcini - Mushroom risotto with Porcini: a perfect autumn recipe


Last night I turned on the electric fire for the first time after the sweet English summer and thought about listing this recipe that is an ideal Autumn warmer, one of my favourite main courses: mushrooms risotto!
It's a creamy (please don't do it watery! That's a soup, not a risotto!) and fragrant dish, and I love to mix fresh mushrooms and dried porcini with loads of parmesan, but you can use the ingredients up to your taste. Somebody uses parsley too, but I prefer it without, just a matter of personal preference I guess,.
Risotto for 2 -  you will need:

one medium onion
Arborio rice 150 gr  (this rice is rhe ideal one to prepare risotto because of the creamy texture it gives)
fresh mushoroom
dried mushoom ( I could not find only  porcini , so I had to use a mix of them, but nice anyway)
vegetable or chicken stock half litre
butter, pepper and olive oil
parmesan cheese grated


First of all prepare your main ingredients: chop the fresh mushrooms and place the dry ones in a bowl with hot water so that they get the right consistency.
Drain the rehidrated dry mushrooms and make sure you don't throw away the water used for the dry mushrooms, as it's now infused with flavour and will be used later on.


Chop them in fine pieces.


Now that the main ingredients are prepared you can start the base of your risotto, use a small amount of butter in some olive oil and add the chopped onion (I used a red one, but standard onions will be absolitely fine). Stir for some minutes.


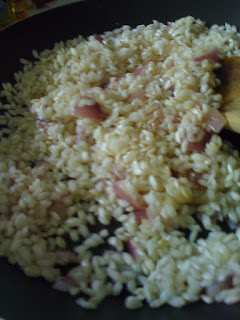
Now add the rice to the onion base: it needs to 'toast' for a couple of minutes so don't add any stock yet. This way the rice will be rich of flavour.


Now it's time to add the stock (half of it, as I use it gradually as the rice cooks. And the all  mushrooms. Keep stirring...


I added some drops of black truffle infusion I got in Italy (absolutely personal taste, but wanted to share the idea in case you're fond of the peculiar taste of truffles just as I am)


When the rice is cooked and still not too dry (still has a little bit of liquid stock in it) you will need to turn off the fire and 'Mantecare' that basically means mix some butter and grated parmesan in it and keeping stirring so that the creamy texture and flavours are enhanced.


That's it! This is the basic procedure for any kind of risotto: just change the main ingredients to what you best prefer and you can have endless possibilities to try. Another of my favourite risotto recipes is 'Salsiccia e Zafferano' (Saffron and Sausages) or champaigne and smoked provola. Hmmm...I think I am going to prepare my lunch...quite hungry after this post hehe have you all a great week end!

Tuesday, 14 September 2010

linguine alle verdure - ready in 10 minutes linguine with vegetables


When it comes to preparing my lunch I wish it could be ready in 10 minutes, but excluding all those microwave stuff and frozen fish fingers ...what else could be the choice to save my time but eat nice healthy stuff anyway?

Italians have the answers hehe.Here's how I made my 10 minutes ready delicious vegetables linguine. (it's just a matter personal preference to spaghetti, I like the texture of linguine pasta better):


in one pan I start boiling the water with salt

at the same time in another frying pan I use a little bit of olive oil, chopped red onion and let it cook for 3 minutes with a couple of anchovies 

roughly chop courgettes, fresh mushrooms, fresh cherry tomatoes and mix it in the pan for the sauce, add some chopped basil (always chop the fresh basil using the hands, not the knife)

when the water is boiling add the pasta until 'al dente' and drain it : I always always always use the pan where I prepared the sauce to finish the pasta for a minute with a medium fire : this way the taste will be stronger and the condiment properly spread. 

If you like, you can add some grated parmesan :) 

Enjoy!


Wednesday, 8 September 2010

Braciole napoletane al sugo (beef rolls neapolitan way)


It's amazing how food and meals names can be so different from region to region of the same country.
I have been living my first 10 years in a small village near Napoli, southern Italy, and then moved north near Milan just until before I moved to United Kingdom. I can cleary see the difference in the meaning of food names between the Italian regions: one of these examples is 'braciola'.
In napoli it actually refers to these delicious beef rolls I am going to describe in the recipe below, while in norther Italy it refers to something rather different as it's the definition of a pork chop with rib just cooked in a pan or grilled.

I am actually going to show you my procedure to prepare these mouth watering  and succulent beef rolls, typical Sunday meal in Napoli. The neapolitan tradition in fact is to cook a 'ragu' sauce for the whole family, and forget the tinned ragu sauce you're used to ...it's something completely different and it also reflects the philosophy of the neapolitan style: take it easy, be patient, and don't worry!

We can consider the neapolitan braciole as one of the several addition to the ragu : they can be part of it or they can simply be prepared in this way (you and your guests won't be disapponted!).

You will need:

fine cut beef steaks (I used about 430 grams for the picture above)
pine nuts
garlic crushed
parmesan cheese grated (if you can find pecorino cheese even better)
fresh chopped parsley (very important)
tomato passata one bottle
tomato paste
olive oil (a good Italian olive oil possibly)
a glass of white wine
salt and pepper
toothpicks  or cooking string to keep the meat in a roll shape while cooking

prepare the ingredients on a board and spread the chopped garlic, parsley, pine nuts all over each beef steak, sprinkle the grated  parmesan on top of it


form the rolls, and hold them in place with some toothpicks (or cooking string). Start 'sealing' the meat in a pan frying it first for some minutes with olive oil, then add 1/2 glass of white wine and let it dry


add the tomato passata sauce, and a couple of spoons of tomato paste (concentrated)...let it simmer for about one hour until the sauce is less liquid and has a nice brown colour to it.

Trick: you can use this as a double meal: use the sauce as condiment for some home made taglatelle and the meat as second course (this is what we do in Naples :)) 

enjoy!